How to Make Heatless Hair Curlers - Spoonflower Blog
Par un écrivain mystérieux
Last updated 09 mai 2024

Looking for an easy, healthy and handmade way to curl your hair? Learn how to sew fabric curlers with Bonnie from Peppermint Magazine.
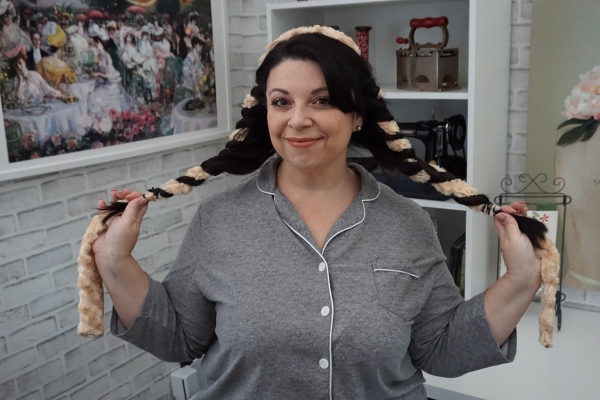
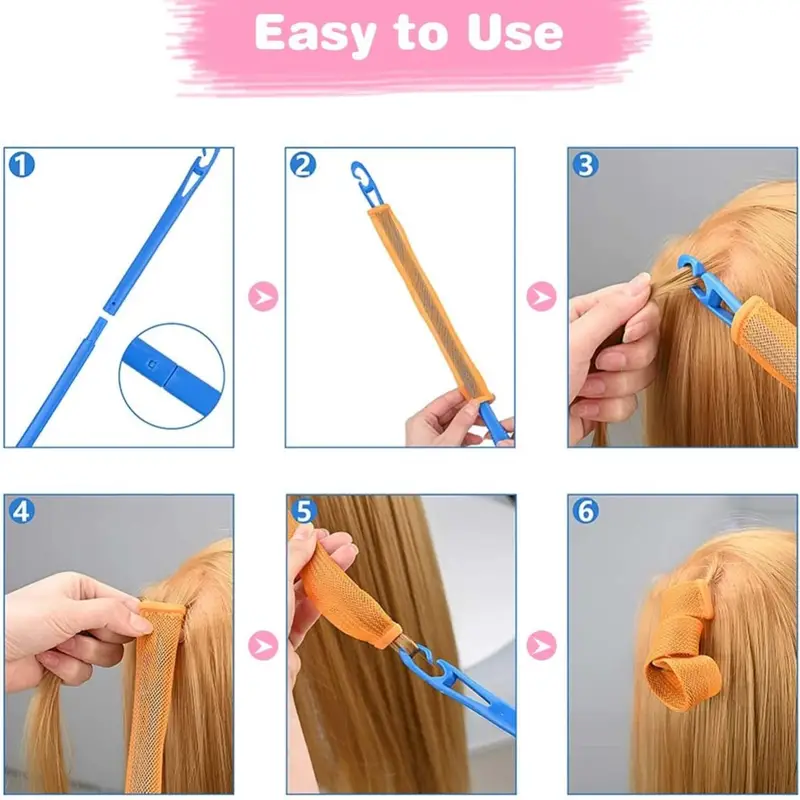
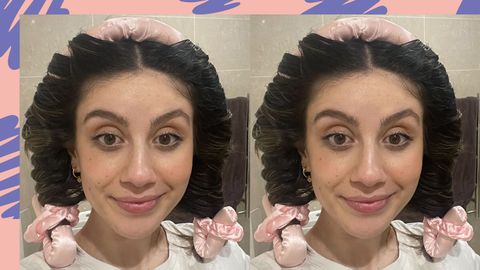
Using a fat quarter of satin fabric from Spoonflower, follow along with Bonnie from Peppermint Magazine to learn how to sew your own fabric hair curlers, perfect for healthily and easily giving your locks a new look! Featured design: Vanilla Daisy Seaglass by sage&finch Bonnie: It is the nature of humanity to long for what we haven’t got—the grass is always greener et al—which is why many people born with naturally curly hair straighten it and many of us born with straight hair seek to curl it. There are many methods offered to those who seek a beautiful bounty of bouncing curls, from voraciously eating all our bread crusts, a tragically inefficient method in the follicle transformation department despite the lies of our parents and caregivers, to ceramic hot irons and chemical perming treatments, which are generally quite effective but according to current thought are not the healthiest for your hair. Hairdressers, scholars and TikTok innovators alike have toiled to come up with alternative options for those of us longing for low-key ways to give our hair low-key waves—and some think they’ve found the solution with a heatless hair curling set! These are sold for premium prices but it’s just as easy to make them yourself! Kiss ‘n' Curl: DIY Heatless Hair Curlers MaterialsSkill level: Beginner1 fat quarter of satin (we used this Vanilla Daisy Seaglass design) Your choice of stuffing (Polyfill or even fabric scraps)Sewing machine Fabric scissors or rotary bladePins or fabric clipsMeasuring tapeFabric marker or pen About the Fabric Silk and satin are recommended for use in pillows, hair wraps and overnight accessories because their smooth weave reduces friction against your hair, stopping it knotting, frizzing or splitting. It also doesn't absorb moisture in the same way as cotton, which helps keep natural oils in your hair keeping it luxurious and healthy, and it feels lovely and soft which helps everyone get a good night's sleep! Spoonflower’s Satin substrate is perfect for hair related projects! Steps to Create Your Own Curlers 1. Prep the Pieces Cut out one long rectangle (28” long by 4” wide, 71.12 cm long by 10.16 cm) and two smaller rectangles (18” long by 4” wide, 45.72 cm by 10.16 cm). You may want to make the large rectangle a little longer, up to 39 (99.06 cm), if you have very long hair, as I made the curlers in this tutorial for my shoulder length hair. Featured design: Vanilla Daisy Seaglass by sage&finch 2. Form the Curl Take your long rectangle and fold in half lengthways, right sides together. Pin along long edges and sew together. Sew one of the short edges together as well. Because satin is fairly prone to frying and these seams will be under some pressure, it is best to finish these seams with an overlocker or zig zag stitch. Now you have essentially a long tube, open at one end. Flip right sides out. 3. Stuff the Curler Using the open end, fill your tube with the stuffing of your choice. You want the tube to be full enough to hold its shape, but not so stuffed that it is no longer bendable and too stiff to sleep on top of. 4. Close the Tube Fold in the raw edges of the open end of the tube by 1/4 (0.64 cm) and pin together. Topstitch or hand-stitch closed. 5. Make Scrunchies Take your two smaller 18” by 4” (45.72 cm by 10.16 cm) rectangles. Fold in one of the short edges by 1/4 (0.64 cm) and press down. Fold in half lengthwise, right sides together, and sew together. Turn right side out. 6. Add the Elastic Cut 8” (20.32 cm) of 1/4 (0.64 cm) or 1/2 (1.27 cm) elastic. Using a safety pin, thread the elastic through your scrunchie tube. Due to the disparate lengths, the scrunchie fabric will get all scrunched up. Stitch the ends of the elastic together securely. 7. Finish Overlap the edges of your scrunchie together with the folded-in edge overlapping the raw edge (make sure your fabric isn’t twisted). Topstitch or hand stitch together. A complete curler! How to Use Your Finished Fabric Hair Curlers For optimum results, your hair should be damp, not wet. For longer lasting curls, you can use a small amount of setting lotion or curl defining cream to each strand as you go. 1. Place the curler on top of your head making an upside down U-shape. To make things easier, you can secure it in place with a hair clip. 2. Starting near the middle of the U and going towards the ends, in small sections, wrap your hair around the curler. As you go, add more and more hair, twisting as you wrap to stop shorter hairs or layers from escaping. Once all your hair is wrapped around the curler, keep it in place with your scrunchies. 3. Wear overnight, or until your hair is totally dry. You can use a hairdryer to speed up this process. If you have fine hair that’s likely to slip, slide and skedaddle its way right out of its curling confinement in the middle of the night, you can keep it in place with a hairnet or scarf. Remove the scrunchies, dramatically shake out the curls and enjoy your luscious locks! Curly Hair WearsWhat goes best with a new hairdo? New accessories! Continue reading the Spoonflower Blog for more sewing tutorials such as headbands or bucket hats.Sewing Tutorials
Using a fat quarter of satin fabric from Spoonflower, follow along with Bonnie from Peppermint Magazine to learn how to sew your own fabric hair curlers, perfect for healthily and easily giving your locks a new look! Featured design: Vanilla Daisy Seaglass by sage&finch Bonnie: It is the nature of humanity to long for what we haven’t got—the grass is always greener et al—which is why many people born with naturally curly hair straighten it and many of us born with straight hair seek to curl it. There are many methods offered to those who seek a beautiful bounty of bouncing curls, from voraciously eating all our bread crusts, a tragically inefficient method in the follicle transformation department despite the lies of our parents and caregivers, to ceramic hot irons and chemical perming treatments, which are generally quite effective but according to current thought are not the healthiest for your hair. Hairdressers, scholars and TikTok innovators alike have toiled to come up with alternative options for those of us longing for low-key ways to give our hair low-key waves—and some think they’ve found the solution with a heatless hair curling set! These are sold for premium prices but it’s just as easy to make them yourself! Kiss ‘n' Curl: DIY Heatless Hair Curlers MaterialsSkill level: Beginner1 fat quarter of satin (we used this Vanilla Daisy Seaglass design) Your choice of stuffing (Polyfill or even fabric scraps)Sewing machine Fabric scissors or rotary bladePins or fabric clipsMeasuring tapeFabric marker or pen About the Fabric Silk and satin are recommended for use in pillows, hair wraps and overnight accessories because their smooth weave reduces friction against your hair, stopping it knotting, frizzing or splitting. It also doesn't absorb moisture in the same way as cotton, which helps keep natural oils in your hair keeping it luxurious and healthy, and it feels lovely and soft which helps everyone get a good night's sleep! Spoonflower’s Satin substrate is perfect for hair related projects! Steps to Create Your Own Curlers 1. Prep the Pieces Cut out one long rectangle (28” long by 4” wide, 71.12 cm long by 10.16 cm) and two smaller rectangles (18” long by 4” wide, 45.72 cm by 10.16 cm). You may want to make the large rectangle a little longer, up to 39 (99.06 cm), if you have very long hair, as I made the curlers in this tutorial for my shoulder length hair. Featured design: Vanilla Daisy Seaglass by sage&finch 2. Form the Curl Take your long rectangle and fold in half lengthways, right sides together. Pin along long edges and sew together. Sew one of the short edges together as well. Because satin is fairly prone to frying and these seams will be under some pressure, it is best to finish these seams with an overlocker or zig zag stitch. Now you have essentially a long tube, open at one end. Flip right sides out. 3. Stuff the Curler Using the open end, fill your tube with the stuffing of your choice. You want the tube to be full enough to hold its shape, but not so stuffed that it is no longer bendable and too stiff to sleep on top of. 4. Close the Tube Fold in the raw edges of the open end of the tube by 1/4 (0.64 cm) and pin together. Topstitch or hand-stitch closed. 5. Make Scrunchies Take your two smaller 18” by 4” (45.72 cm by 10.16 cm) rectangles. Fold in one of the short edges by 1/4 (0.64 cm) and press down. Fold in half lengthwise, right sides together, and sew together. Turn right side out. 6. Add the Elastic Cut 8” (20.32 cm) of 1/4 (0.64 cm) or 1/2 (1.27 cm) elastic. Using a safety pin, thread the elastic through your scrunchie tube. Due to the disparate lengths, the scrunchie fabric will get all scrunched up. Stitch the ends of the elastic together securely. 7. Finish Overlap the edges of your scrunchie together with the folded-in edge overlapping the raw edge (make sure your fabric isn’t twisted). Topstitch or hand stitch together. A complete curler! How to Use Your Finished Fabric Hair Curlers For optimum results, your hair should be damp, not wet. For longer lasting curls, you can use a small amount of setting lotion or curl defining cream to each strand as you go. 1. Place the curler on top of your head making an upside down U-shape. To make things easier, you can secure it in place with a hair clip. 2. Starting near the middle of the U and going towards the ends, in small sections, wrap your hair around the curler. As you go, add more and more hair, twisting as you wrap to stop shorter hairs or layers from escaping. Once all your hair is wrapped around the curler, keep it in place with your scrunchies. 3. Wear overnight, or until your hair is totally dry. You can use a hairdryer to speed up this process. If you have fine hair that’s likely to slip, slide and skedaddle its way right out of its curling confinement in the middle of the night, you can keep it in place with a hairnet or scarf. Remove the scrunchies, dramatically shake out the curls and enjoy your luscious locks! Curly Hair WearsWhat goes best with a new hairdo? New accessories! Continue reading the Spoonflower Blog for more sewing tutorials such as headbands or bucket hats.Sewing Tutorials

How to Make Heatless Hair Curlers - Spoonflower Blog

How to Make Heatless Hair Curlers - Spoonflower Blog

How to Make Heatless Hair Curlers - Spoonflower Blog

Pin on Products

Tutorials Archives - Page 4 of 34

DIY Scrapbusting Heatless Hair Curlers!

Top 10 heartless hair curler tutorial ideas and inspiration

DIY Scrapbusting Heatless Hair Curlers!
Holiday Hair Gifts, Part 1: DIY Heatless Curling Ribbon - WeAllSew

How to Make Heatless Hair Curlers - Spoonflower Blog
Recommandé pour vous
 Heatless Curling Rod Headband, TSV Sleeping Hair Roller for Women, Heatless Hair Curler, Hair Curl Ribbon with Clips and Loops, Black/Pink/Leopard14 Jul 2023
 Best Heatless Hair Curlers? CurlFormers Dupe Review, Tutorial & Demo14 Jul 2023
 Heatless Hair Curlers for Long Hair, Lazy Crimper to Sleep in, Soft Wave DIY Hair Rollers Styling Tool for Overnight No Heat Curling Rod Headband for14 Jul 2023
 Heatless Hair Curler14 Jul 2023
 Heatless Hair Curlers For Evening Use Octopus Shaped Hair - Temu14 Jul 2023
:max_bytes(150000):strip_icc()/030323-heatless-hair-hack-lead-12bd68c79b814e7a801c93982dd5cf4f.jpg) These $8 Conair Foam Rollers Give You Curls That Last14 Jul 2023
These $8 Conair Foam Rollers Give You Curls That Last14 Jul 2023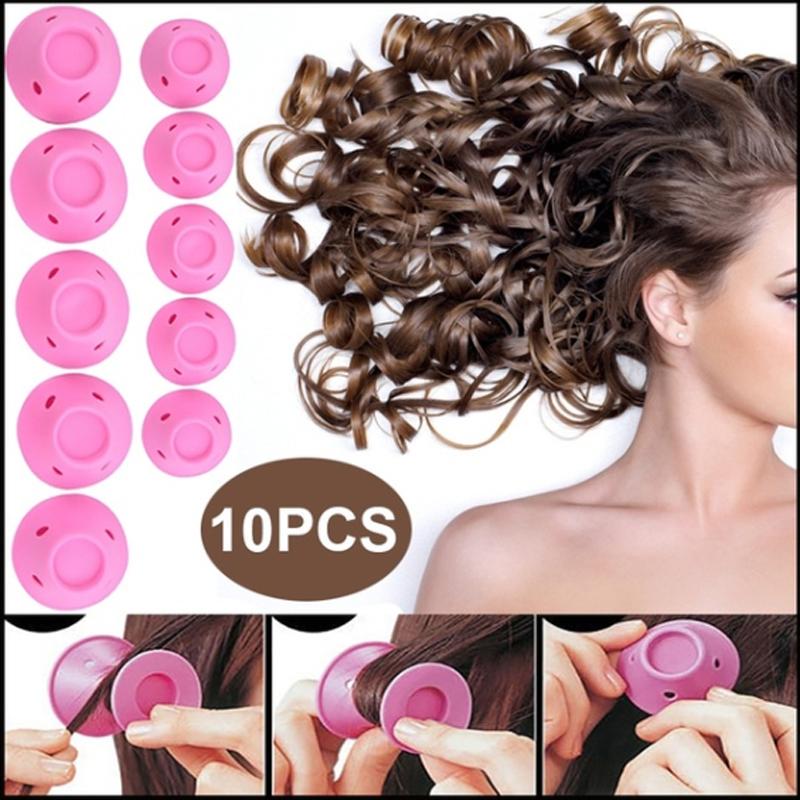 Heatless Hair Curlers - For Short and Long Hair - ShayBun14 Jul 2023
 Luxury Silk Heatless Hair Curler14 Jul 2023
- Heatless curler review: I tried the TikTok heatless curler; How to use it explained and is it worth it14 Jul 2023
 Heatless Curls. magic Spiral Hair Curlers Set No Heat - Temu14 Jul 2023
Tu pourrais aussi aimer
 Plat de service en porcelaine blanc doux. Collection traces de Marianne Chemla. – Marianne Chemla - m céramique14 Jul 2023
 Livret de Famille personnalisé, idée cadeau personnalisable, cadeau mariage original, Protège Livret de Famille Nacré Ambre Coeur - CL0065a : : Mode14 Jul 2023
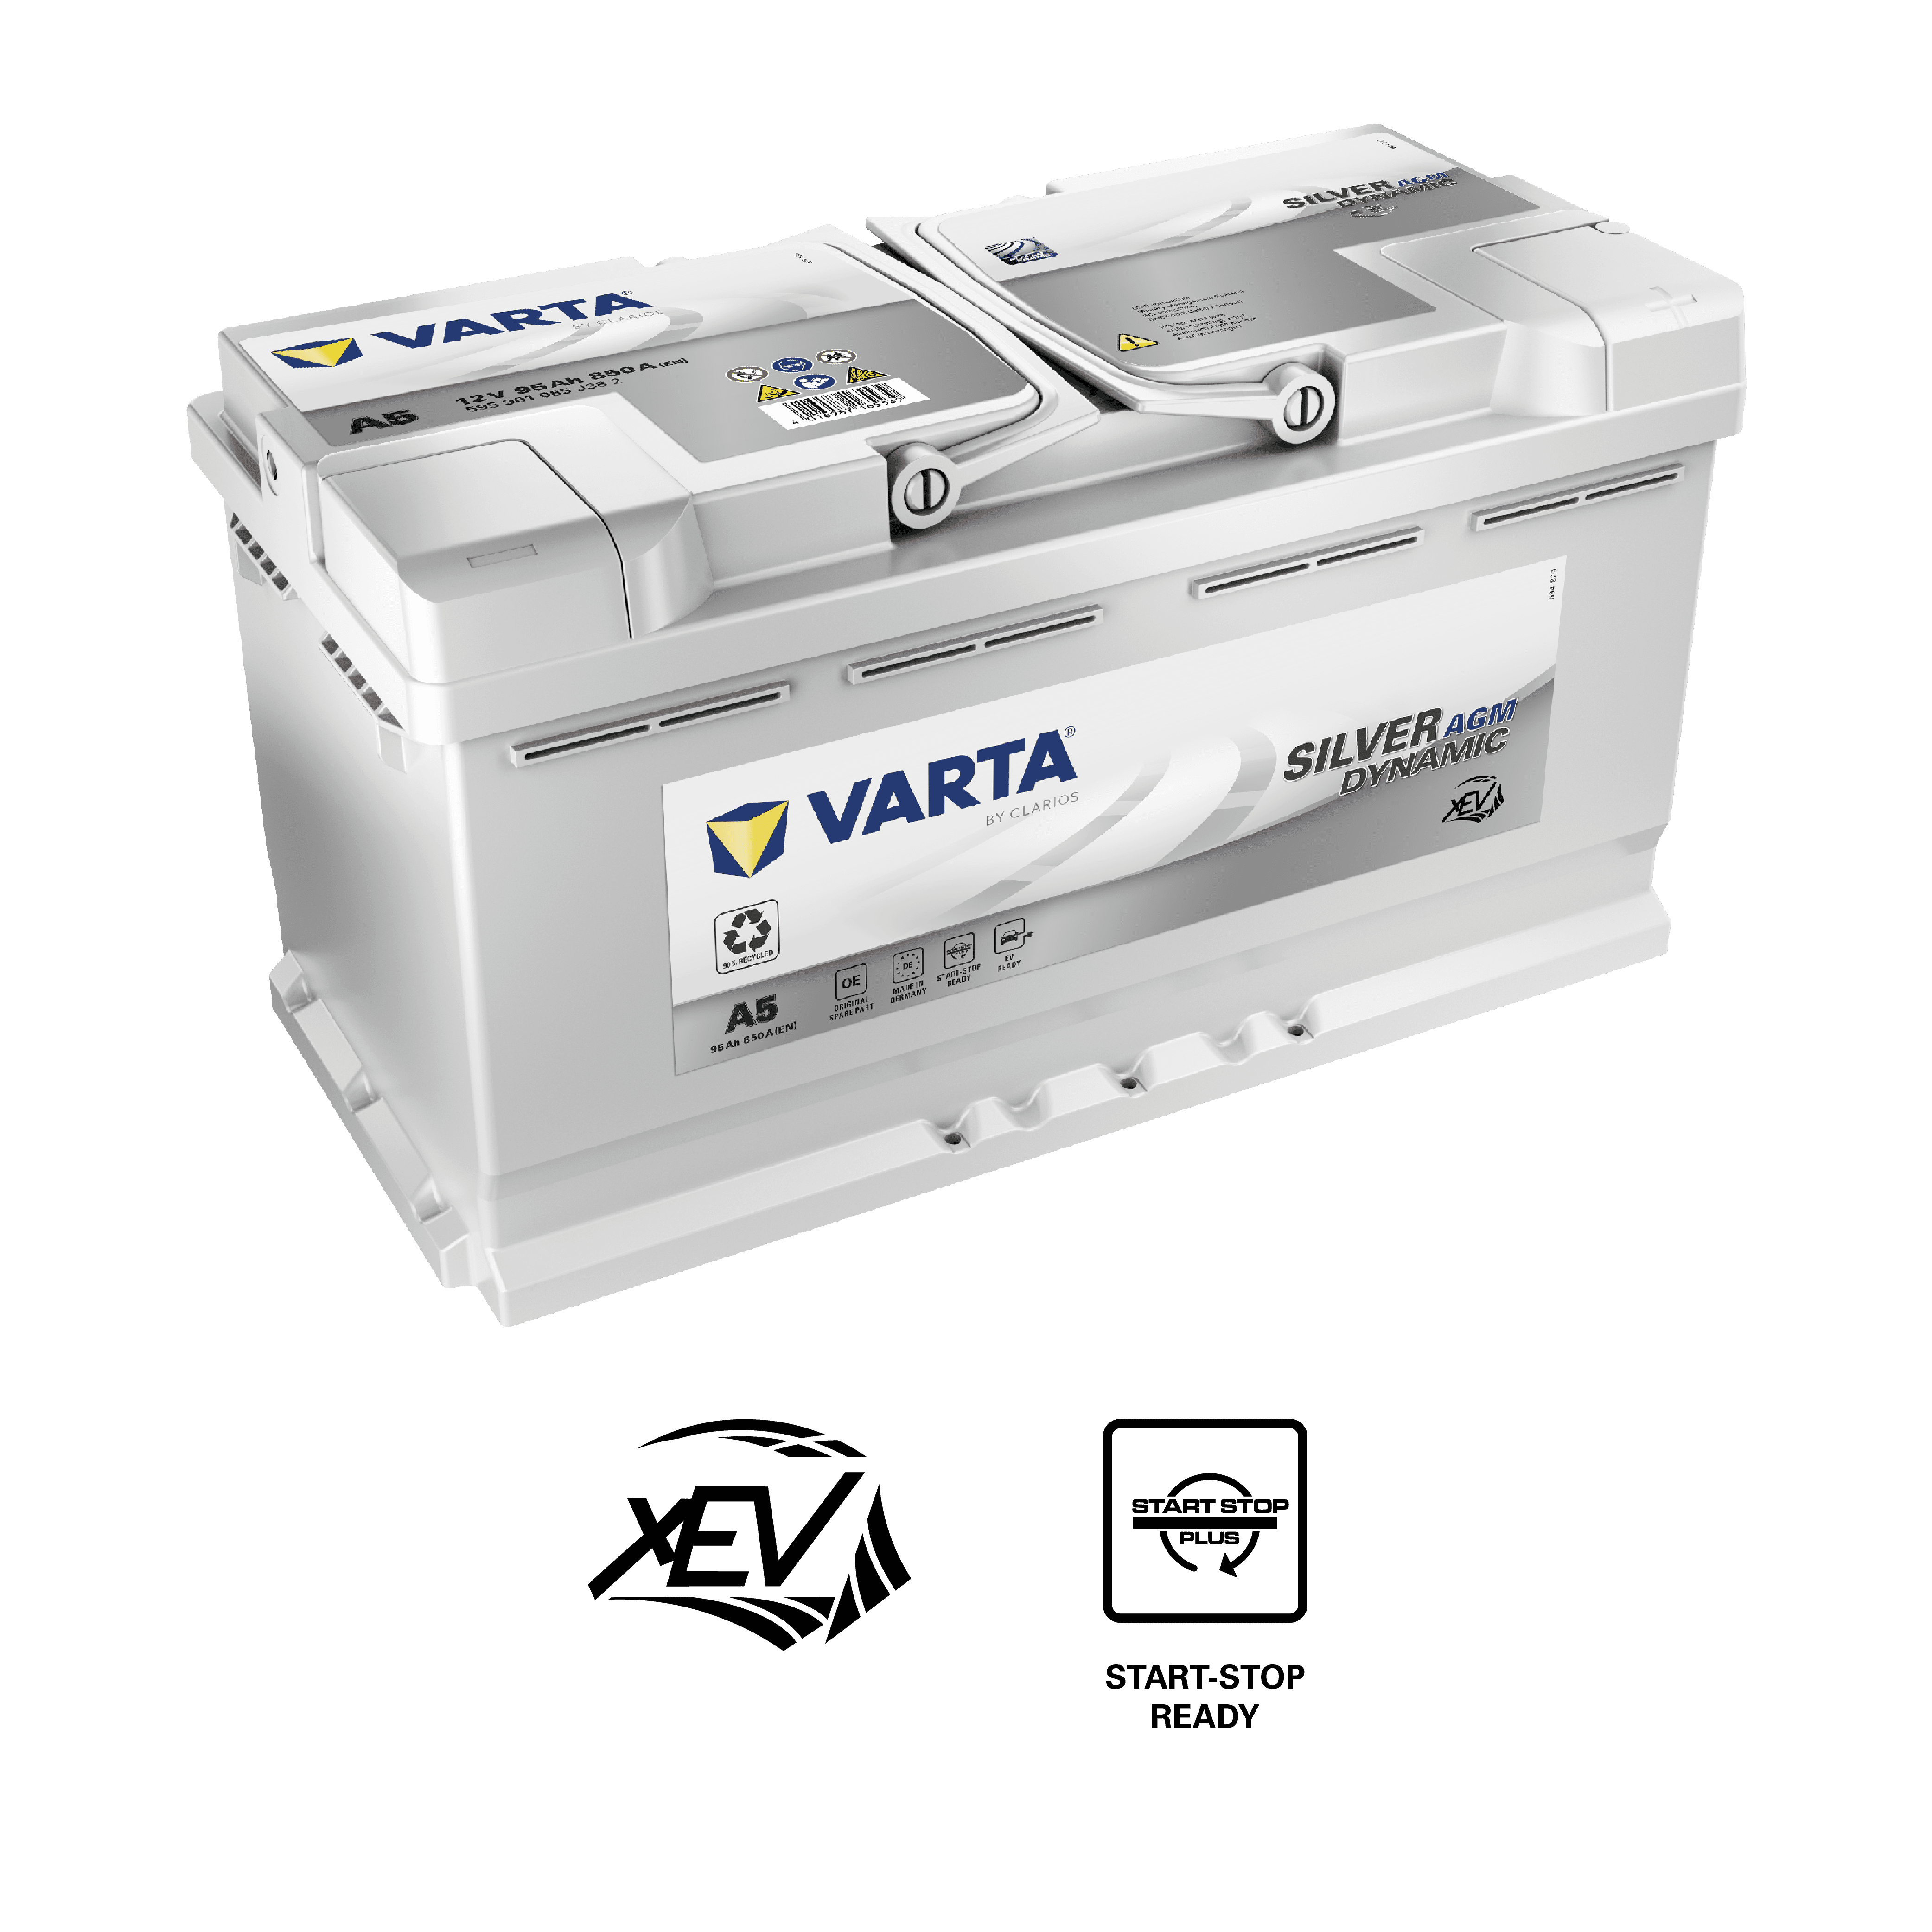 Batteries START STOP – Battery service14 Jul 2023
 Attache tétine personnalisée panpan - Fait main avec ♥︎14 Jul 2023
 Soldes Micro Ondes - Promos et réductions janvier 202414 Jul 2023
 Roller Skates - Quad, Inline and Aggressive14 Jul 2023
 Dimension Rock - ANTHOLOGIE - Fiche livre - Critiques - Adaptations - nooSFere14 Jul 2023
 Crochets de porte en plastique - 12 accroche14 Jul 2023
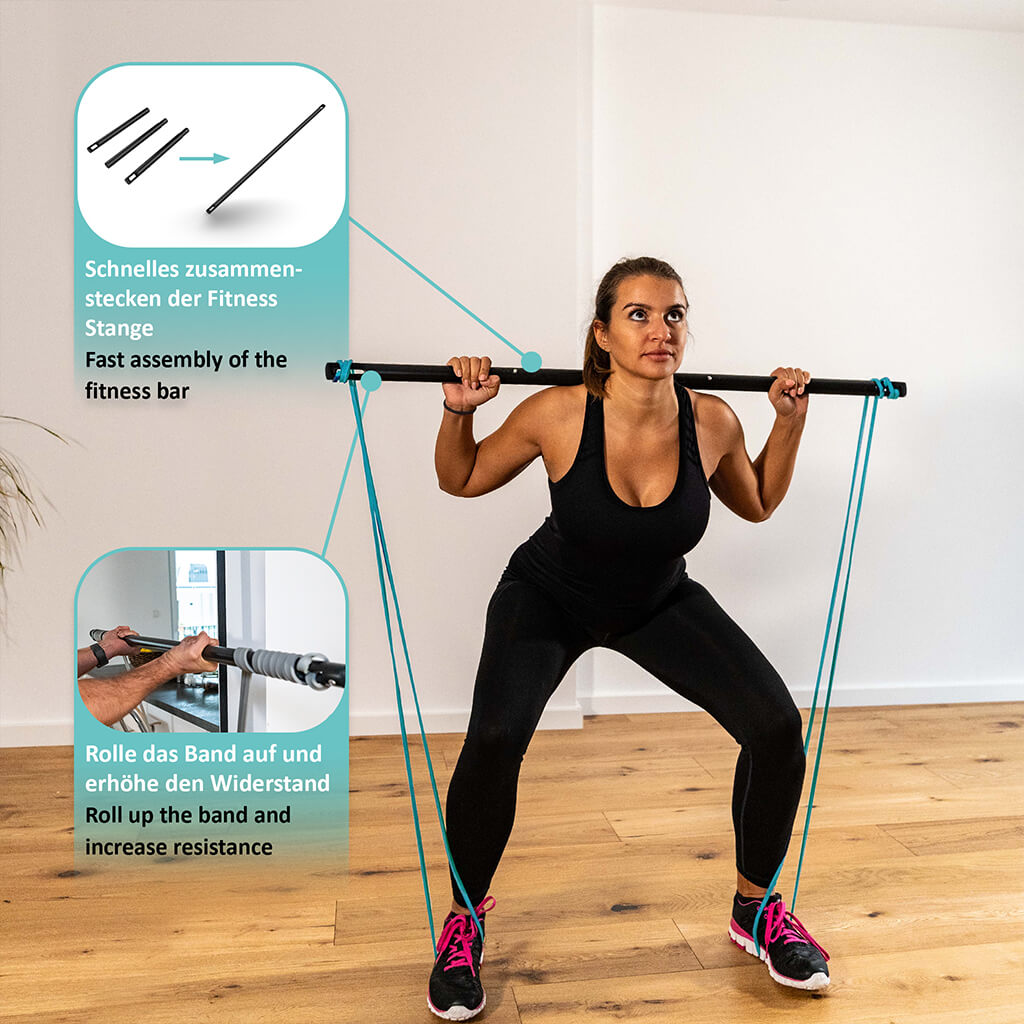 Barre élastique de musculation pour un entraînement en intérieur et en extérieur.✓ A combiner avec des bandes pour de nombreux exercices ✓ Entraînement du haut et du bas du corps.14 Jul 2023
 Toblerone MINI MIX 904G14 Jul 2023